Protected branches
Learn how to use Neon's protected branches feature to secure access to critical data
Neon's protected branches feature lets you apply IP restrictions to specific branches in your Neon project as an added layer of data protection. The following retsrictions also apply to protected branches:
- Protected branches cannot be deleted.
- Protected branches cannot be reset.
- Projects with protected branches cannot be deleted.
- Computes associated with a protected branch cannot be deleted.
You have to remove branch protection before you can perfom these actions. See Remove branch protection.
The protected branches feature is available with the Neon Scale plan.
How to set up protected branches
The protected branches feature works in combination with Neon's IP Allow feature. The basic setup steps are:
- Define an IP allowlist for your project
- Restrict IP access to protected branches only
- Set a branch as protected
Define an IP allowlist for your project
To configure an allowlist:
- Select a project in the Neon Console.
- On the Neon Dashboard, select Project settings.
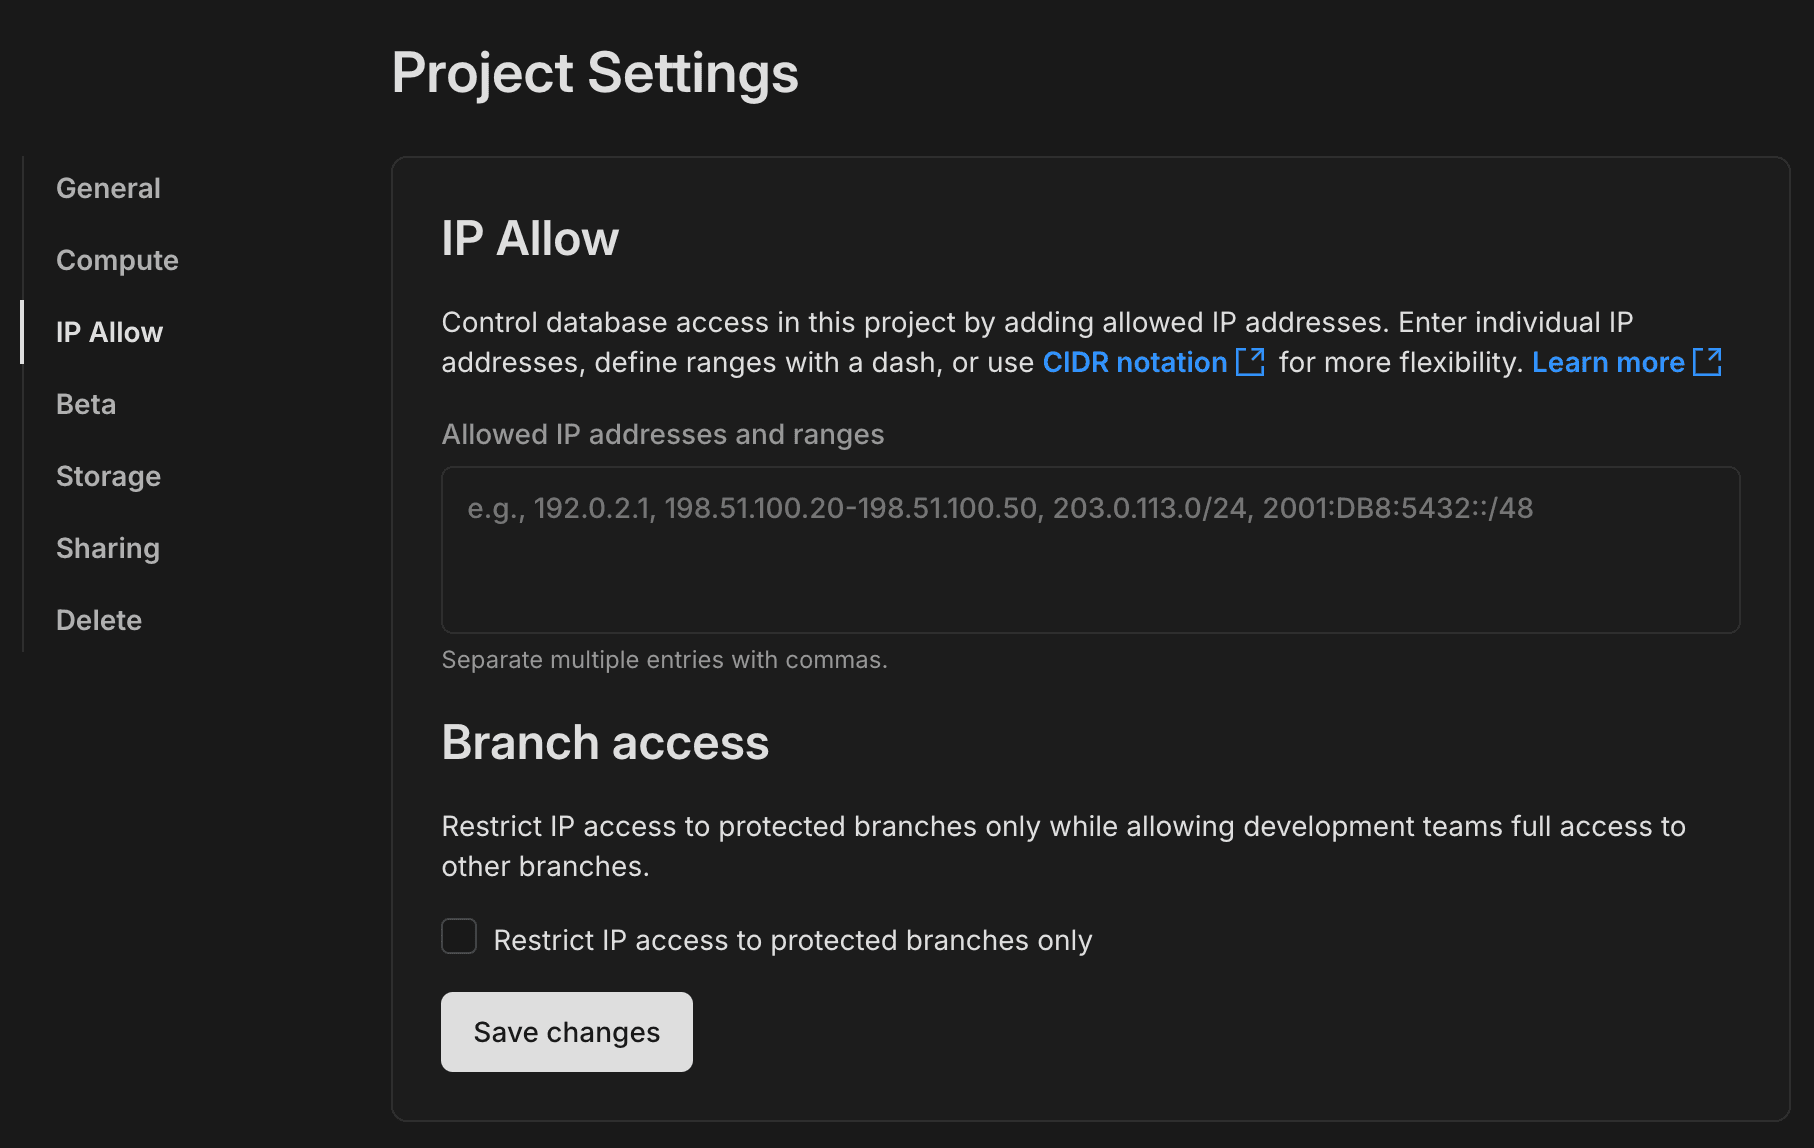
- Select IP Allow.

- Specify the IP addresses you want to permit. Separate multiple entries with commas.
- Optionally, select Allow unrestricted access to non-default branches to allow full access to your non-default branches.
- Click Save changes.
For details about specifying IP addresses, see How to specify IP addresses.
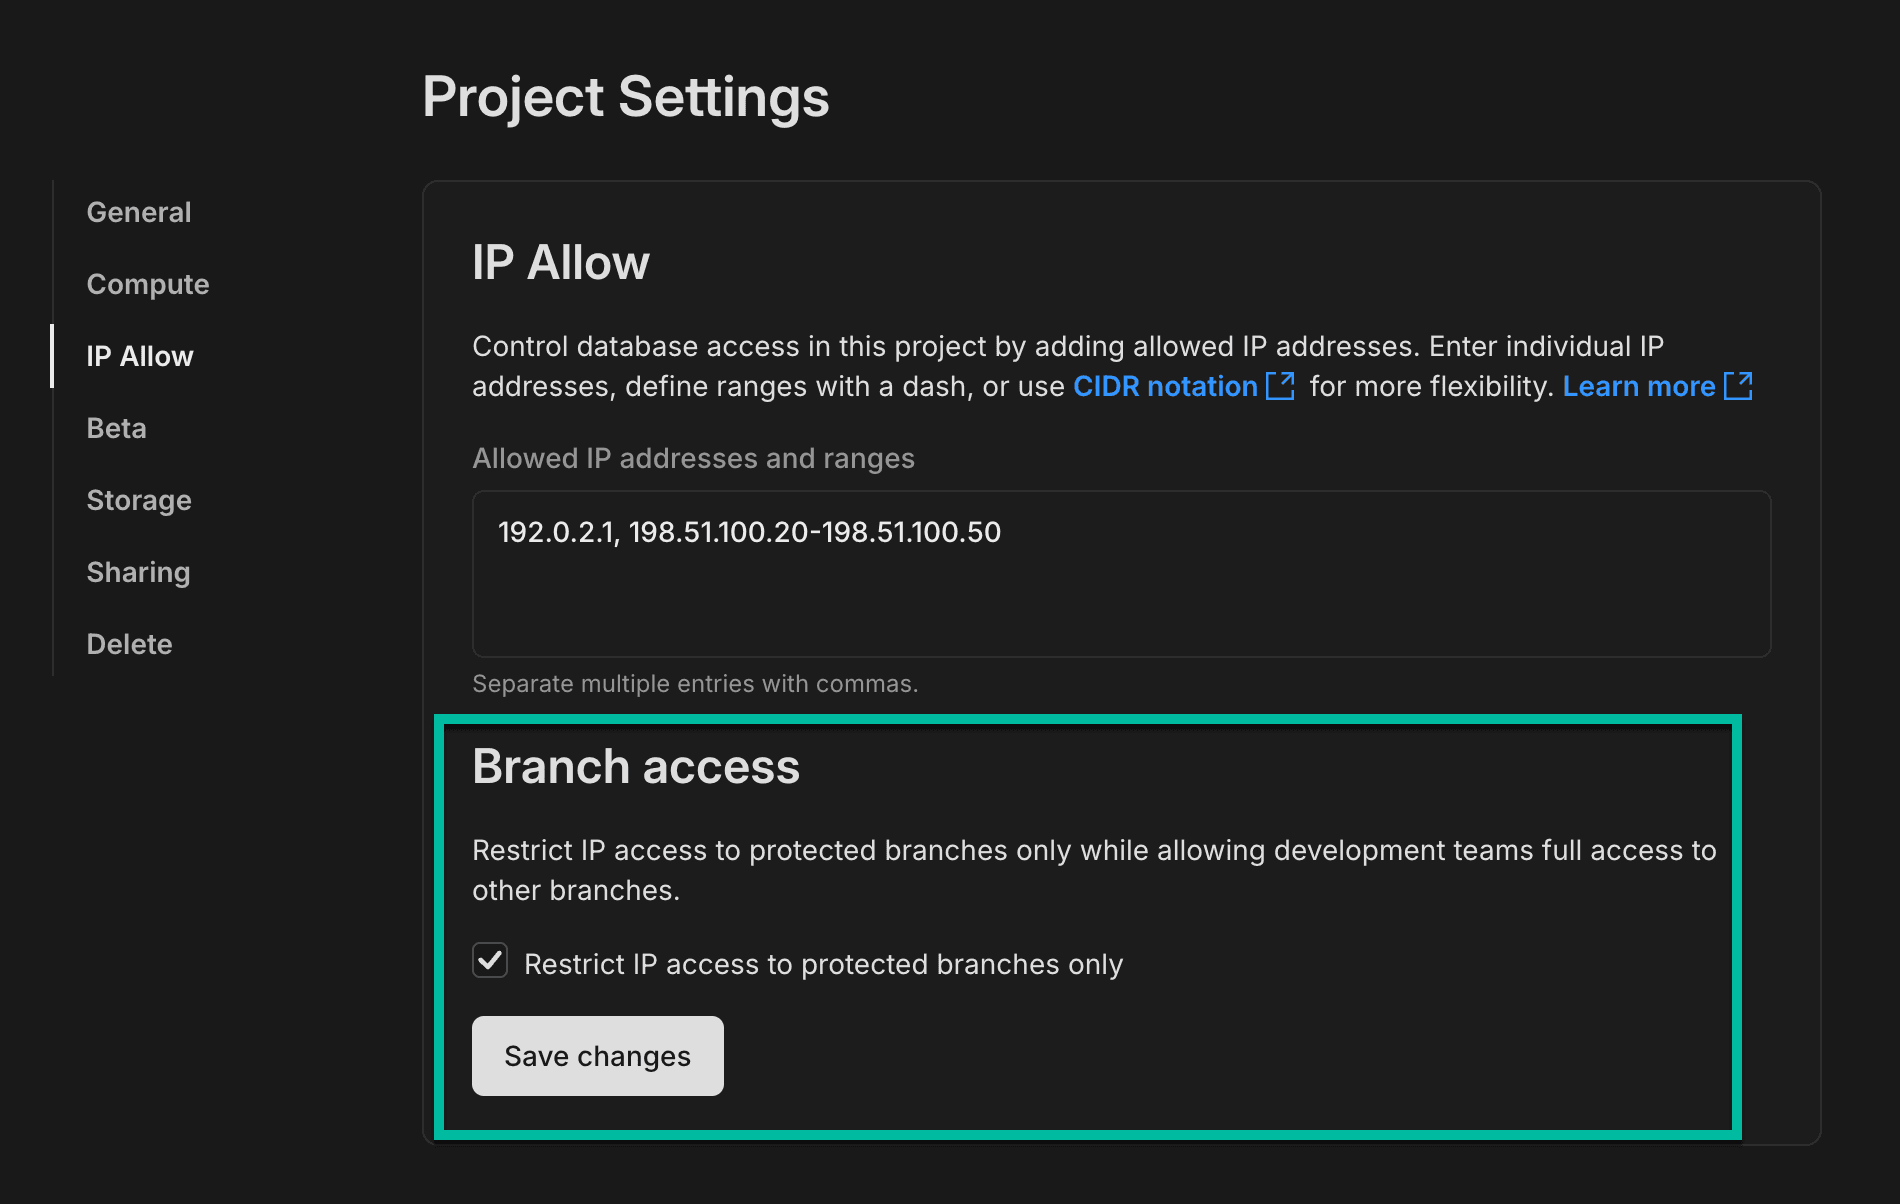
Restrict IP access to protected branches only
After defining an IP allowlist, the next step is to select the Restrict access to protected branches only option.

This option removes IP restrictions from all branches in your Neon project and applies them to protected branches only.
After you've selected the protected branches option, click Save changes to apply the new configuration.
Set a branch as protected
The last step in the setup is to designate a branch as protected. We'll define a single branch as protected in this example, but you can have up to 5 protected branches.
To set a branch as protected:
-
In the Neon Console, select a project.
-
Select Branches to view the branches for the project.

-
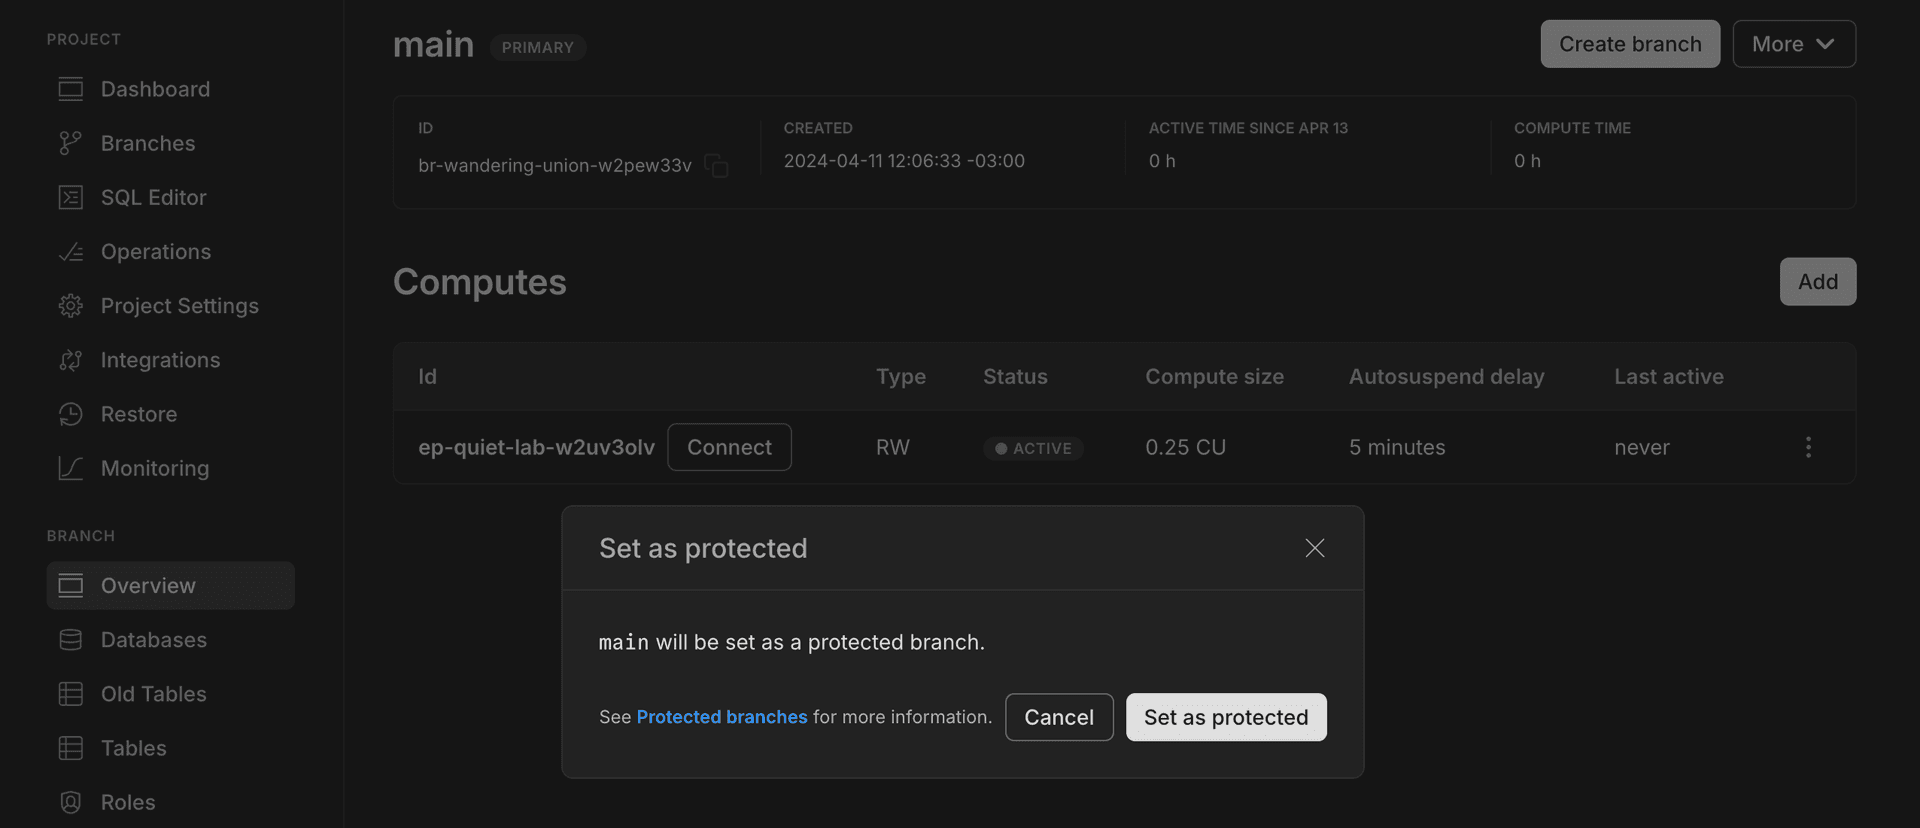
Select a branch from the table. In this example, we'll configure our default branch
mainas a protected branch. -
On the branch page, click the More drop-down menu and select Set as protected.

-
In the Set as protected confirmation dialog, click Set as protected to confirm your selection.

Your branch is now designated as protected, as indicated by the protected branch shield icon, shown below. Only the trusted IP addresses on your IP allowlist will be able to connect to this branch.
important
With this configuration, there is no restriction on IP access to the other branches in your project.

The protected branch designation also appears on your Branches page.

Remove branch protection
Removing a protected branch designation can be performed by selecting Set as unprotected from the More drop-down menu on the branch page.
Need help?
Join our Discord Server to ask questions or see what others are doing with Neon. Users on paid plans can open a support ticket from the console. For more detail, see Getting Support.
Last updated on